Choose your 303 exterior protection by the job you want to finish. A dedicated coating session, a quick step at the end of a wash, and a light touch-up before a weekend drive call for different bottles. The useful distinction is how each product fits into that routine: what condition the surface needs to be in, how you spread the product, and what you do immediately afterward.
This guide compares four options from the 303 graphene and ceramic collection. It also helps you organize the work, avoid common application mix-ups, and decide when washing or correcting the finish should come before another layer of protection.
Choose by the task in front of you
Start with the car as it sits today. Is it freshly washed and ready for a deliberate coating application? Are you standing beside a wet vehicle with the hose still connected? Or are you dealing with a few fingerprints on otherwise clean paint? Answering that question narrows the choice faster than comparing the words graphene and ceramic on their own.
| Product | Useful role | Application outline |
|---|---|---|
| 303 Graphene Nano Spray Coating | A dedicated exterior coating application | Apply to clean, dry paint; let it haze white; buff. |
| 303 Graphene Detailer | A coating topper or maintenance step | Use wet or dry; spread and finish with separate towels. |
| 303 Spray & Rinse Ceramic Sealant | Protection during a wash | Mist a wet, cool section; rinse immediately; dry. |
| 303 Slick Shine Ceramic Detailer | Light cleanup or a finishing step | Spread on a wet or dry surface; wipe off separately. |
The application differences above follow the manufacturer’s directions for Graphene Nano Spray Coating, Graphene Detailer, Spray & Rinse Ceramic Sealant, and Slick Shine Ceramic Detailer. Read the bottle you have before starting, especially when switching between products.
You do not need all four for every wash. Choose one principal protection method, then decide whether a detailer solves a separate maintenance need. That makes the routine easier to repeat and gives you a clearer view of what each step contributes.
Inspect the finish before adding protection
Walk around the vehicle in good light before setting out your applicators. Look at the lower doors, rear hatch, wheel arches, roof, and hood individually. A clean upper door can sit beside a rocker panel carrying road grime. The condition of the dirtiest area matters when deciding whether you can use a quick detailer or should plan a complete wash.
Separate loose dirt from defects in the finish. Mud, road film, and dusty deposits call for cleaning. Swirls, scratches, oxidation, and etched marks need their own assessment. A glossy surface treatment can change the appearance of a reflection without repairing the underlying defect. If correction is part of your plan, settle that decision before applying protection.
For a recently purchased used car, make a simple list of what you know: paint repairs, wraps, protective film, unusual trim, and any coating documented by the previous owner. An unknown finish deserves a small compatibility check before a full application. Keep the vehicle or film manufacturer’s care instructions beside the product directions when working with a specialty surface.
Also look at the work area. You need room to move around the car, a place for clean towels, and enough light to see residue. A narrow parking space with one door inaccessible can turn an otherwise simple job into repeated stopping and repositioning. Move the vehicle before you wet it or start applying a product.
Apply Graphene Nano Spray Coating with a clear section plan
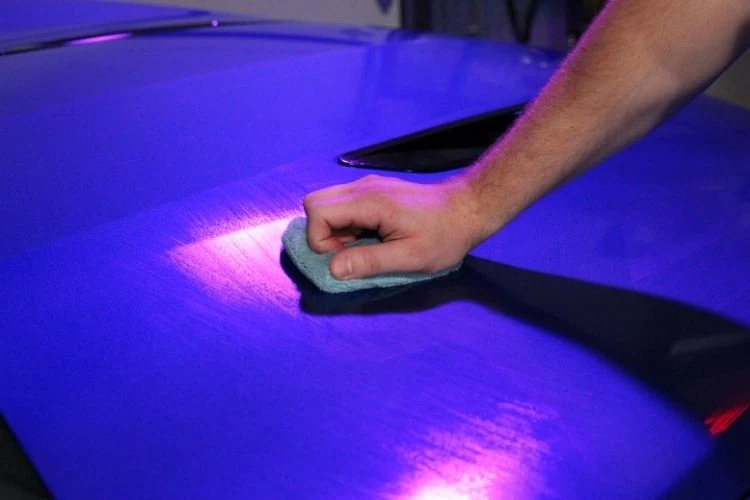
303 Graphene Nano Spray Coating is the option to consider when you want to make coating the main task. Its directions call for clean, dry paint, application with a microfiber or foam applicator in crossing passes, and buffing once the product has hazed white. Gold Eagle says no additional waiting period is needed before water exposure after buffing. Read the coating directions.
Think through the route around the car before the first application. You might divide the hood into manageable areas, finish the roof, then work down one side and around the rear. The exact order matters less than having an order you can remember. Use body seams as landmarks and finish one area before getting distracted by another.
Place the application towel and finishing towels in different spots. For example, keep the applicator in a shallow tray and clean buffing towels in a covered container. This is a practical way to avoid picking up the wrong cloth halfway through the job. A towel lying on the ground should leave the working rotation immediately.
Gold Eagle’s application guide describes the haze as the cue for removal and notes that temperature affects the wait. It also treats paint correction as optional, based on the appearance you want, rather than a prerequisite for bonding. Use that distinction to plan your day: washing and coating can be one project; restoring neglected paint may be another. See the manufacturer’s application guide.
After finishing a section, change your viewing angle. A reflection that looks even from directly above can reveal a missed edge when you step to the side. Check around badges, the bases of mirrors, panel transitions, and the border of the hood. Use light to inspect your work instead of repeatedly touching the finish.
Reserve time for this final pass. If you have one hour available, avoid spending all of it on application and leaving inspection for a dark garage later. A shorter, well-organized session is easier to evaluate than a rushed attempt to treat every possible surface at once.
Use Graphene Detailer for a separate maintenance job
303 Graphene Detailer can be used on wet or dry surfaces and as a topper over other coatings or waxes. The directions call for shaking the bottle, applying with a clean microfiber towel or directly to the surface, working section by section, and removing residue with a separate clean towel. Check Graphene Detailer directions and compatibility.
For a post-wash routine, organize the car into the same sections each time. This makes it easier to see whether a particular area tends to need extra attention. Mirrors and trim can release trapped water after the main panels appear dry, so revisit those areas during the final inspection rather than assuming every streak is product residue.
The manufacturer also describes Graphene Detailer as suitable for light dust and fingerprints between washes. Its guidance calls for a proper wash when there is caked-on dirt or heavier grime. That boundary is useful: a detailer is a convenient answer to a small cleanup, but the condition of the surface still decides whether wiping is appropriate. Read Gold Eagle’s detailer guide.
Imagine a clean car parked in the garage overnight. A fingerprint near the door handle is a different task from the same car after a rainy highway commute. Treating those situations alike simply because the bottle is within reach makes the routine less predictable. When the contamination is widespread, bring washing back into the plan.
Keep a few clean towels available if you carry a detailer in a vehicle. One cloth that has been used for door jambs, wheel residue, and paint is a poor starting point for a careful touch-up. A small labeled bag for fresh towels and a separate bag for used ones keeps the kit straightforward.
Keep Spray & Rinse close to the hose
303 Spray & Rinse Ceramic Sealant fits into the washing stage. Work out of direct sunlight on a cooled vehicle. Leave the washed exterior wet, apply a light mist to one section, and rinse that section immediately. After treating the remaining areas, dry thoroughly. Those conditions are central to the manufacturer’s directions. Read the spray-and-rinse instructions.
Prepare the hose before opening the bottle. Make sure you can reach the far side without dragging the hose across the paint or stopping to untangle it. The immediate rinse should be an easy next movement. Set your drying towels within reach, with enough clean material to finish the vehicle.
Choose a section size that suits the space and your pace. A broad truck hood and a small hatchback fender are different working areas. If moving around the vehicle takes time, work in smaller sections rather than spraying several panels in advance. Complete the spray-and-rinse sequence before moving on.
Consider the weather over the whole session. Shade beside a building can move across the driveway, and a vehicle that was cool when washing began may become exposed later. Recheck conditions as you go. Postponing a section until the car is properly positioned is easier than improvising a different method halfway through.
This is also a good routine for someone who prefers to complete protection while the wash equipment is already out. It makes less sense when the car has already been dried and put away. Choose a process that matches your actual habits so the protection step does not become an extra project you repeatedly postpone.
Fit Slick Shine into light cleanup and finishing
303 Slick Shine Ceramic Detailer combines SiO2 and carnauba. Gold Eagle positions it for light dust, fingerprints, and post-wash finishing, including use as a drying aid. Apply section by section, spread with a clean microfiber towel, and use another clean towel to wipe off. The directions exclude extremely dirty surfaces and surfaces where slipperiness would be a problem. Read Slick Shine directions.
A useful place for a finishing step is just before your final inspection. That does not mean every freshly washed car needs another product. Decide what you are trying to accomplish, such as a convenient maintenance pass, then inspect the result before adding anything else.
Small details can make the routine easier. Fold towels so you can turn to a fresh face without losing track. Keep the bottle off the paint. Work with the door closed when treating the exterior near the window so you do not scatter mist into the cabin. These habits reduce cleanup and help keep each product within its intended area.
If you already own Graphene Detailer, compare the role you need filled before buying a second maintenance spray. Two detailers may be useful for different vehicles or preferred routines, but owning both does not create a requirement to layer them in the same session. Start with a simple method you can inspect and repeat.
Three realistic routines for different owners
The following examples are planning suggestions. They are designed to help you arrange the work around your space and available time, rather than prescribe a fixed treatment interval for every car.
The owner preparing for a dedicated garage session
Set aside enough time to wash, assess, dry, and apply your chosen coating without rushing the final inspection. Gather supplies first and clear a clean place for towels. If paint correction is part of the plan, allow it its own time instead of squeezing it into the end of the wash.
Graphene Nano is worth considering for this type of session because its application is a distinct task. Record which areas you treated. A simple note such as “paint completed; specialty trim deferred” is more useful next time than a vague recollection that the whole vehicle was detailed.
The owner who washes outside on weekends
Look for a workable period of shade and arrange the hose before beginning. Keep the wash, protection, and drying equipment together. Spray & Rinse can fit this sequence when the required conditions are available. If the driveway becomes sunny or the surface is too warm, change the timing of the job.
Build a routine that still works when you have another commitment afterward. If drying takes longer than expected, simplify the next session by improving access and towel organization. Adding more bottles is rarely the first answer to a scheduling problem.
The owner maintaining an already clean weekend car
Inspect before deciding that a touch-up is enough. Keep light cleanup small, use fresh towels, and resist turning one fingerprint into an unnecessary whole-car wipe. A detailer can suit this kind of maintenance, but a dusty drive or a change in weather may make washing the better next step.
For an occasional-use vehicle, keep notes about storage as well as products. Indoor storage, outdoor parking, road trips, and nearby construction change what you encounter at the next wash. Those observations are more useful than trying to follow another owner’s calendar exactly.
Give towels their own simple system
Preparation does not need to mean a cart full of equipment. It does mean knowing which towel is clean, which has touched a wheel, and which already contains product. Choose a system you can recognize at a glance, whether that is separate containers, distinct colors, or labeled storage bags.
| Station | Keep here | Reason |
|---|---|---|
| Clean supply | Fresh towels in a covered container | Prevents confusion with towels already used. |
| Current section | The active applicator and finishing towel | Keeps the next action easy to follow. |
| Used materials | Used towels separated by task | Keeps wheel and dirty-area cloths out of the paint routine. |
| Laundry | Products and towels with their care directions | Helps preserve the correct cleaning process. |
Check towels before each use, including after laundering. Look for trapped debris and changes in texture. If a towel no longer feels suitable for paint, retire it from that task. A familiar towel is not automatically a clean towel, and a freshly folded one still deserves a quick inspection.
Gold Eagle specifically advises washing Graphene Nano application towels promptly and keeping them separate from towels used for other detailing jobs. Avoid leaving coating residue to harden in the fibers. See the manufacturer’s towel-care guidance.
Read the result without overinterpreting it
Gloss, a smooth feel, and water behavior describe different aspects of a finish. Treat them as observations rather than a single score. A photograph of tight beads does not tell you how carefully the car was washed, whether the paint has scratches, or what protection remains beneath a freshly applied maintenance product.
Take photographs in similar light if you want a useful personal record. Stand in the same position and include a reflection that helps reveal uneven areas. Comparing a cloudy driveway photograph with one taken under bright garage lights can make a finish appear dramatically different even when the treatment has not changed.
Be especially careful with longevity expectations. Gold Eagle gives product-specific protection claims, but your own maintenance plan should account for exposure and care. Use the label as a starting point, then observe the clean surface over time. Avoid interpreting a calendar date as proof that every panel needs immediate retreatment.
Water marks also deserve a separate diagnosis. Start by identifying what is visible and when it appeared. Did the car dry before you reached that panel? Did water drip from a mirror afterward? Has the mark remained through a careful wash? Answering those questions is more useful than applying another coat in the hope that it will hide the problem.
Troubleshoot the process before changing products
If the finish looks uneven, stop expanding the work area. Inspect the section you just treated, the towel you used, and the instructions for that bottle. Changing products immediately can make it harder to identify what happened.
- Residue visible in reflections: check whether you completed the specified removal step and whether your finishing towel is still clean.
- One area keeps looking different: inspect its surface condition, prior repair history, and exposure before assuming the product behaved uniformly everywhere.
- The work feels rushed: reduce the section size and improve access to the next tool or towel.
- A fresh drip appears after drying: check mirrors, trim joints, and other places where rinse water can collect.
- The same issue returns: photograph it and consult the product manufacturer with the exact product name, surface, and application sequence.
Avoid experimenting with aggressive solvents or abrasive tools simply because a mark is frustrating. Surface-specific advice matters, particularly on film, wraps, glass treatments, matte finishes, and repaired paint. A clear description of the problem gives a support specialist a better starting point than “the coating did not work.”
Once the issue is resolved, change one part of your routine at a time. That may mean a fresher towel, a smaller work area, better lighting, or a different appointment with the driveway shade. Keeping the rest of the process steady helps you understand whether the adjustment actually helped.
Plan a session you can finish comfortably
Before a long drive, it is tempting to turn vehicle preparation into an ambitious detailing project. Start with the time available and the car's condition. If you need to leave soon, choose a manageable cleaning task and save a complete coating session for a day when you can work without watching the clock.
Write down the stages you intend to complete before gathering equipment. Include washing, any separate surface work, the chosen protection step, inspection, and putting materials away. Cleanup belongs on the list because wet towels and open supplies should not become an unfinished job after the vehicle is ready.
For a larger vehicle, access can be the main constraint. Think about how you will reach the roof comfortably, where the hose will run, and how much room remains beside the garage wall. Use suitable stable equipment for access and avoid stretching across the paint with clothing or accessories pressed against it. If an area cannot be reached properly, solve that problem before beginning.
A shared workspace needs its own plan. Let another person know which towels and tools are in use, especially if they are helping. Divide the vehicle into clear responsibilities, such as one person handling washing while another prepares clean drying materials. Two people working on the same panel without an agreed sequence can make a simple process confusing.
Keep a short record after the first session. Note the product, areas treated, weather, and any practical difficulty. You do not need an elaborate detailing journal. A few sentences on your phone can remind you that the hose would not reach the passenger side or that the final inspection needed better lighting.
At the next wash, use those notes to improve the setup before changing the product. Moving the car a few feet, laying out spare towels, or starting at a different time may be the most useful improvement. A routine that fits your actual space and schedule is easier to maintain than a complicated sequence copied from someone with a different garage.
Keep paint protection separate from fabric and interior care
A vehicle contains several different care tasks. Paint, textile upholstery, vinyl trim, and a fabric convertible top should not be treated as interchangeable just because they sit on the same car. Before extending an exterior routine to another material, check that material and the exact product label.
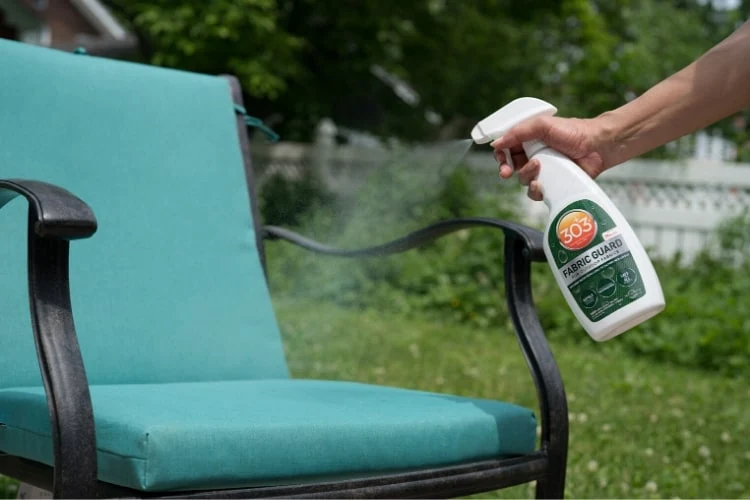
Use the 303 Aerospace Protectant guide when planning care for compatible non-fabric surfaces, and the 303 Fabric Guard guide for fabric treatment questions. Keeping those jobs separate also makes it easier to control overspray and avoid carrying one product into another work area.
Build your kit around the next real task: a washed car ready for coating, a wet car ready for a rinse-off step, or a clean finish that needs a small touch-up. Choose the appropriate 303 exterior-care product, read its directions, and give the final inspection the same attention as application.